Yes, you read that right! Take your camera home and experiment with it. Especially if you are a newbie to digital photography beyond the P&S cameras for family.
Understand the Fundamentals of Photography
for Ideal Dental Photos by Having FUN
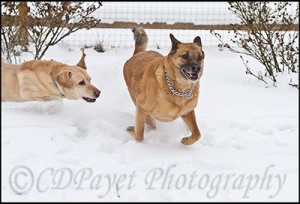
While you don’t HAVE to understand how DSLR cameras work in order to get the best results (visit our page on basic settings for dental intraoral and extraoral photography for my recommendations), it is a lot easier to do so, and a lot more fun, if you do learn. And the easiest and most enjoyable way to learn, is simply to take your camera home and shoot as many pictures as you can. One warning however……it can get addictive! My personal home photo catalog is nearly 27,000 images, and my work catalog is now over 45,000. 😀 Some examples (click on the image for larger versions):
Every one of these images required understanding different combinations of ISO, aperture, shutter speed, etc. As I said, you don’t NEED to learn this, but if you do, you will then really KNOW how to take the pictures you want, especially when you want to start taking fun portraits. And you’ll end up with more exciting and dramatic pictures of your family and vacations.
OK, so I was having a bit of fun just “showing off” a few of my favorite photos 😀 , but I think you get the point, right? Realistically, shooting your family and pets around the house and neighborhood will give you the closest comparison to what you will shoot for patients, as you can see the effect of different combinations of aperture and shutter speed.
Use Extremes in Aperture and Shutter Speed to Experiment– on MANUAL MODE
If you always have the camera on full Automatic, you don’t have to think, right? So to really see what happens, make sure the camera is on (M)anual on your top dial; do leave the lens on (A)utofocus to minimize the aggravation of having out-of-focus pictures of your kids, especially if they’re like mine and move fast.
Experiment #1:
- ISO 100
- WB: Cloudy
- Shutter speed: 1/200
- Aperture: f/3.5
Experiment #1a: Keep everything the same except change Aperture to f/15
Experiment #1b: Keep everything the same except change Shutter speed to 1/80
Experiment #1c: Keep everything the same except change WB to Tungsten
Use a Notebook to keep track
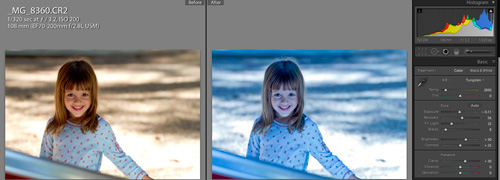
If you’re not familiar with using the Metadata that is automatically captured with very image, then consider keeping a notebok and writing down each combination per picture. Yes, I know this can be a bit time-consuming, but it is a time-honored tradition that works very well. Of course, if you take a minute and learn where to see the Metadata within your photo software, then you can look at each image and compare on screen, best using a side-by-side view as below.
Shoot RAW and you can change the WB within your software
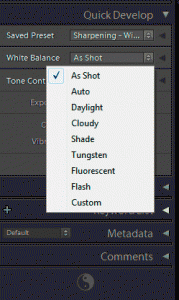
 Obviously, once you’ve taken the picture, you can’t change most of the settings. There is ONE setting, however, that you can change in your software if you have been shooting RAW images, and that is the White Balance (WB). This allows you to experiment a bit more easily, as you can leave the WB setting the same for every picture, then just switch the setting on the computer and immediately see how it changes. At left is what the drop-down menu looks like in Lightroom.
Recommended Reading:
Understanding Exposure by Bryan Peterson is one of the best books for getting a good grasp of these concepts. And once you have become more comfortable with the fundamentals, then read any of his next books to keep going.
For taking routine intraoral and extraoral dental pictures, the main benefit to learning these concepts will be to help you troubleshoot your pictures. The fun part, though, will come when you start taking more patient portraits (as shown on my dental website).


[…] To Take Better Dental Pictures: Take Your Camera Home! : Digital … […]