Ever worry that an unscrupulous web designer, colleague, or ad company might steal your images from your Facebook page, website, or other online source? If so, read on to learn some easy ways to help protect your work, provide legal coverage if necessary for action, and how to find out if your photos have been stolen.
Has Your Photography Been Stolen Online?
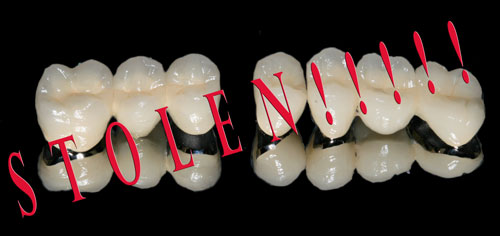 To my knowledge at this time, I’ve never had any of my online photos “stolen,” by which I mean no one has downloaded or “hot-linked” them for use on their on website or in other marketing media. That’s not to say it hasn’t happened, it just means I’ve never found any examples, because I don’t spend the time searching to find out.
Online Image Protection Has Limits
First off – if someone is REALLY determined to steal your photos, it is virtually impossible to stop it. Sure, there are ways to add “right-click” protection to stop the easy “save as” copying, and there are ways to hide the image file location to prevent someone using an HTML embed, but in the end, there are far more ways being created on a daily basis to get around them than there are ways to stop them. If hackers can break into major corporations and government agencies…….well, you get the idea, right? But since it’s unlikely you’re up against that kind of firepower, mostly you’re looking to keep unethical web designers and colleauges from using your work to advertise themselves. Fortunately, there are some easy and fast steps to do this with Photoshop Lightroom, and the best part is that, while the initial set-up takes a little time, after that it is virtually automatic and needs no more than a couple mouse-clicks…..seriously!
Creating Copyright Metadata Templates
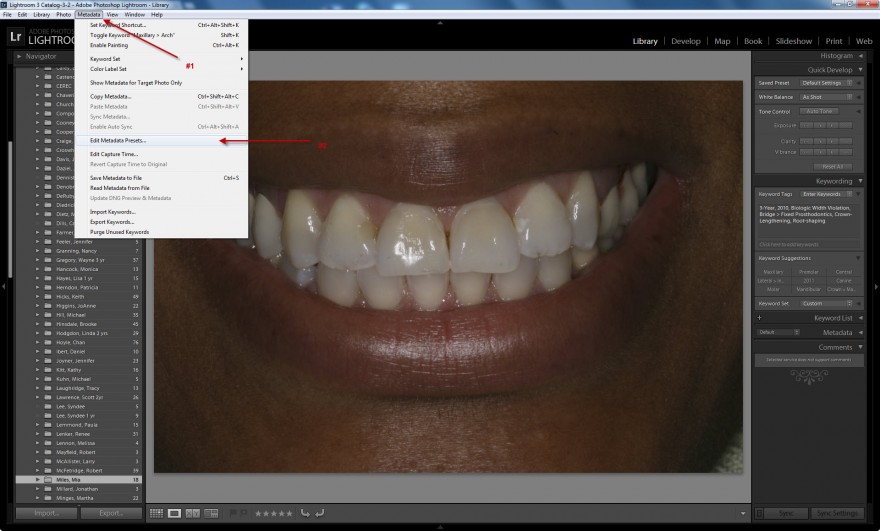
The first step is to create a Metadata Template that can be embedded into your photos. Start at the Menu by choosing Metadata > Edit Metadata Presets, and you’ll see the following Dialog Box pop up (click for a larger view):
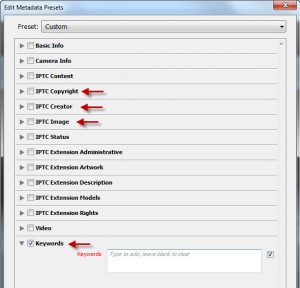 You don’t need to complete everything – total overkill. The ones you do want to complete are the following sections, and at the end of this article you’ll see a set of screenshots of the information I include.
- IPTC Copyright
- IPTC Creator
- IPTC Image (parts of it)
- Keywords
Click the little arrow next to each section, and once you’ve filled in your information, you’ll save this as a new Preset; the easiest thing to do is call it, “Dr. So-and-So,” where you fill in your name.
Applying a Metadata Preset
Once you’ve created your Preset, you have 2 options, and I recommend you do both to be on the safe side:
- Apply that Preset to photos already in your Image Catalog, and
- Set this Preset to be automatically applied whenever photos are imported.
To apply the Preset to existing photos, it’s almost ridiculously easy. Simply select all the photos to which you’ll apply the information, and go to the Right Sidebar of the Library Module > Metadata. When it opens, click on the “Preset” location and choose the Preset you created. You’ll be asked if you want to apply it to just the selected photos, all photos, or another combination. Select “All Photos” And BAM! You’re done with applying that information to photos you already have. Easy, huh?
When you’re ready to import new photos, it’s about this easy, too. Choose Import and select the source from which you’ll be importing the photos, most likely a memory card. Again in the Right Side Toolbar of the Import Dialog, you’ll see a tab titled “Apply During Import.” Directly under that, you’ll see an option to select a Metadata Preset. Do that, and once you’ve chosen the folder to which you want to import, click Import. And BAM! Every photo imported from now on will have that information added to it, unless you change that import option.
Ensure the “Right” Metadata Stays During Export, But Don’t Violate HIPAA
There are a couple items to be sure of when exporting images for use on your website, on a social media platform such as Facebook, etc:
- Do NOT include your patient’s name in the file name or keywords (DUH!)
- When using a Publish Service or Export dialog, make sure to NOT strip out the metadata
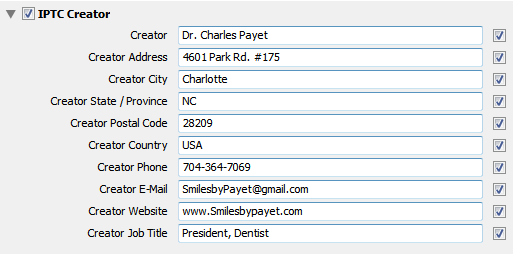
Suggested Metadata to Include
The following are taken directly from the template I have created within Lightroom at my office; for my personal photography, I obviously use different information.

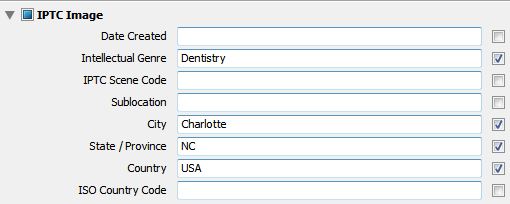

Because this post ended up longer than anticipated, look for an upcoming post on how to easily apply a Watermark with Lightroom.
If you’ve ever had someone steal your photos, I’d love to know how you found out and what you did about it in the Comments below!
Chip,
Great work on this article. This post along with your watermarking post have been very beneficial as I am just beginning to upload clinical pictures to my blog and new website.
Quick question: once you have exported the images from Adobe Lightroom, is there a way to “see” the copyright information to make sure you exported it properly?
Nicholas, it’s been some time since I’ve tried looking for the EXIF metadata after it’s been uploaded to my dental websites. My Smugmug site allows you to see the photo details by clicking on a certain icon; Google+, Flickr, and others usually have an option to see the metadata, too.
I know that Mozilla Firefox had a plugin a long time ago that would let you see the metadata for any photo on the web, assuming it was attached; my guess is they still do, but I don’t know what it is. The other browsers probably also have similar plugins, you’d just have to do a search.
I’m glad to hear that these articles have been helpful! Let me know if there are any other particular ones you’d like to see.
Hi, I’ve developed a way so that the browser does not cache the images.
If the user tries to refer to the image from another website, he/she will get a blank image (or custom image) – similar if the user tries to right-click save picture.
The only way for the user to save the image is the print-screen and paste it into Photoshop etc.
All these methods are great to stop the average person from capturing your image but if the user really wants to use your image – they will.
The best thing to do is to encourage the user not to use the images unlawfully or alternatively make it clear enough to view, but not printed.
Can you tell me a bit about your method for stopping the browser from caching the images? That does sound like an intriguing possibility; could be a good WordPress plugin.
Good question, Mike. To be precise, embedding this information on each photo won’t necessarily prevent a lot of people/companies from stealing them, because a lot of people have no idea how much information is included in every photo besides the pixels themselves. Adding the Copyright info is more a matter of being able to PROVE the photo belongs to you in the event it is stolen and you have to take legal action.
The next post on Watermarking will show demonstrate a techniqe more likely to deter someone from stealing your photo; the 3rd in this series (see what you did!) will discuss some of the online tools available to reverse-search your images to see if anyone is stealing them.
As I mentioned early in the article, though – if someone is truly determined to steal one of your photos, it is impossible to completely stop them. These are a set of tools to DETER theft and to PROVE theft if it reaches that point.