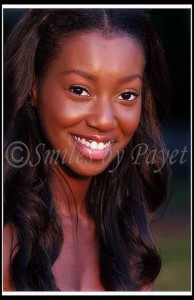
Portrait photography is not a necessary aspect of dental photography for general dentistry, but for dentists interested in expanding their cosmetic dentistry services, especially through marketing in and outside the office, it is essential. But if you’re not a professional photographer, you have a number of questions:
- What camera equipment do you need?
- Do you need any special flashes, backgrounds, etc?
- Do you need a special studio in your office?
- What settings do you need?
Portrait Photography Basics for Dentists
My introduction to portrait photography was with Dr. Tony Soileau at a Nash Institute course back in 2004, and it was the course that sparked my passion for photography beyond the basics. And while intraoral dental photography is the core of what we need, portrait photography is the FUN part! It’s also the most effective kind of photography for promoting cosmetic dental services, such as teeth whitening, veneers, Six-Month Braces, etc.
But how do you take beautiful portrait photos, especially if you don’t have the fancy light boxes, wireless flash triggers, or a special studio? Since that’s the situation most general dentists are in, we’ll cover that first; setting up and using a portrait studio will come later.
Camera Gear for Dental Portrait Photography
First of all, you do not need to buy any additional camera gear to take beautiful portrait photos of your patients. If you want, you can certainly spend more money on a lens often used for portraits by pros, or a shoe-mounted top flash, , etc., but they’re not necessary. All you really need is:
- DSLR camera
- Ring flash (do NOT use the pop-up flash!!!)
- Macro lens
What Camera Settings to Use?
The basic camera settings have already been reviewed here: Basic Camera Settings for Dental Photography, but here again are the settings I recommend for portraits:
- Camera on Manual
- ISO: 200
- Shutter speed: 1/200
- f-stop: f/8.0
- Flash: reduce the power on the flash by -1 to provide some “fill” light to reduce harsh shadows but not blow out the highlights.
- NEVER, EVER, EVER USE THE POP-UP FLASH!
Automatic Focus for Portraits, Not Manual
Portrait photography is the ONE EXCEPTION to using manual focus for dentists, for one very simple reason: it’s a lot easier when learning. I know from experience how frustrating it is to do a 15-30 minute photo shoot, have a lot of fun with the patient, load the pictures on your computer, and then realize they’re all out-of-focus! Experienced photographers may choose manual, but this is not my recommendation for the basics.
Tips for Non-Boring Portraits
If there’s one thing you do NOT want to do, it’s to take boring portraits – the whole point of using portraits is to get potential patients excited about what you can do for them, and for that, you want dynamic, beautiful, attractive portraits. So how do you do this?
- Don’t shoot the patient head-on – have the patient turn their body a little to the side
- Make sure the patient has their neck extended up and head is turned slightly – this helps stretch the neck and decrease creases, wrinkles, etc.
- Shoot outside about an hour before sunset if possible – you get this AMAZING golden light
- Never shoot outside during mid-day unless in the shade
- Make sure to have female patients do their hair and make-up they way they like – unless they have bad taste. Then? Pay a little to have a make-up artist help – trust me – it’s worth it.
- Learn a little Photoshop – sharpening and skin smoothing to reduce wrinkles, make the eyes a little brighter, and make the teeth a little crisper for enlargements or the web
- Get the patient to LAUGH! Tell some bad jokes, get them to tell some of their favorite stories, anything.
- Find a lovely bench, stone wall, lamp post, flower pot, blooming tree….anything for the patient to lean against, lie down on, etc. It gives the patient a chance to pose a little, and makes the photo look less posed, even though it is.
- Women especially like to make this a big deal – have them bring a couple different outfits, if there’s a place they can change clothes. Or bring a hat, sunglasses, scarves….anything to mix it up. For guys – sunglasses or a hat are the only accessories they’ll accept.
- WHEN STARTING OUT, TAKE A LOT OF PICTURES. Bear in mind – this is easier with women; guys will often ask if you’re done after 5-10 pictures.
- Make sure you get a Model Release to avoid getting in trouble using the photos. (I’ll be posting an example you can use soon).
