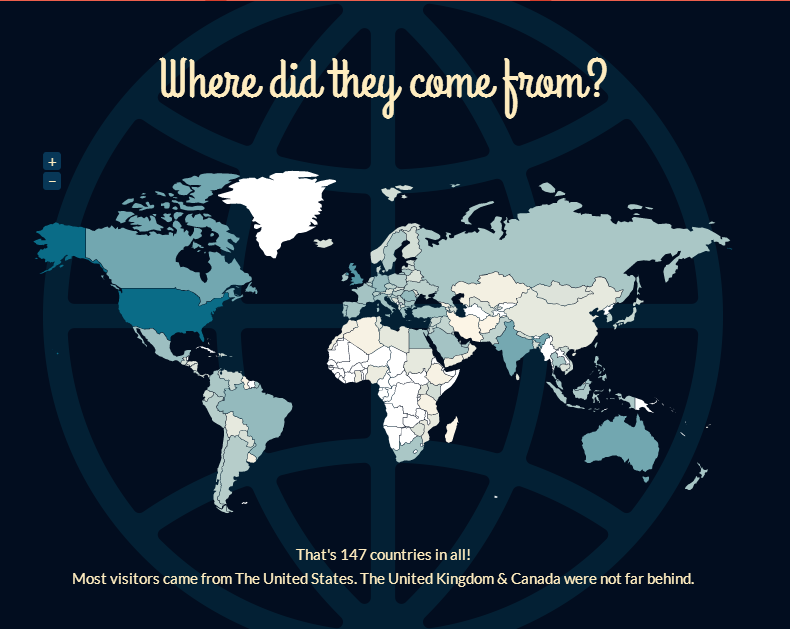
As 2012 is wrapping up, I thought I’d share one particular graphic from my annual WordPress.com report received today, as it is just pretty darn amazing to me and really illustrates the power we have to reach the world through the Web. The graphic sums it all up – 147 countries!
Dental Camera Gear
Shade Matching Made Easy
Do you struggle with taking accurate shades for challenging anterior cosmetic dentistry cases, such as large composite resins or porcelain crowns? Like most of you, I’ve always considered this one of the hardest aspects of dentistry, even with the power of digital photography. Now, however, a new tool has arrived that promises to revolutionize and simplify this challenge. It’s easy to use, affordable, and the most powerful tool for analyzing and communicating hue, value, and chroma in our dental restorations that I have ever used.
The polar_eyes Cross-Polarizing Filter
I first learned about this revolutionary new filter design on Facebook from Dr. Jason Smithson, whose composite resin artistry easily rivals that of the best lab technicians. Designed by Dr. Panaghiotis Bazos, a Greek dentist trained at the University of Southern California (Class of 2000), this filter is easily attached to Canon, Nikon, Sigma, and Metz ring flashes.
Color is Complicated
Just recently, Dr. Lane Ochi posted an Online CE Course on DentalTown.com that uses Color Theory to teach how we perceive color, and while I had learned some of this earlier, he gives the most thorough description I’ve seen – highly recommended. Fair warning – you’ll probably want to review it several times to really absorb the material, because he packs a LOT into that 1-hour course.
In simple terms, however, one of the biggest challenges we face when taking shades for cosmetic dentistry, whether porcelain or composite, is the reflection of light from the teeth, whether that reflection comes from overhead lights, ceiling lights, or the camera flash. The human eye has difficulty dealing with how that reflection can hide details of color. And given that most of us aren’t trained in truly understanding color, even if we can see it, how do we communicate it to the lab? For years, dentists have used different kinds of shade-matching devices, but based on many reviews, none of them have been particularly easy to use, and most of them are expensive.
Eliminate the Glare, and What’s Left is Color and Brightness
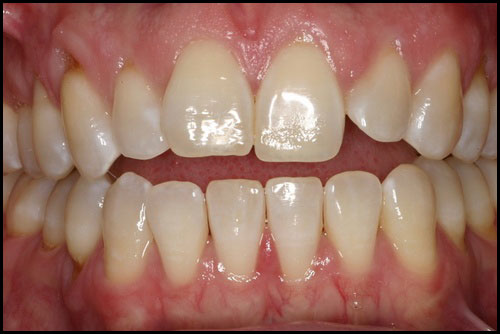
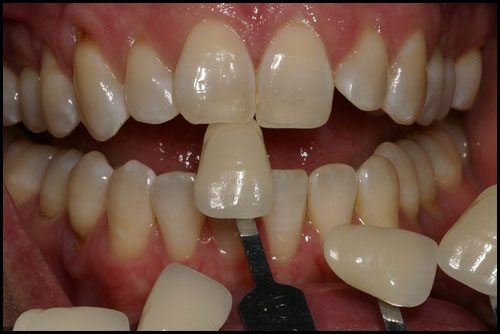
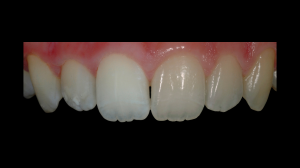
Take a look at this example photo (courtesy of Dr. Bazos), and what do you see? On the right side of the photo is what we typically see in DSLR photos taken with a ring flash, and on the left side is how teeth look when photographed using the same exact settings and the polar_eyes cross-polarizing filter. The difference is striking and easy to understand.
Since this blog is dedicated to making dental photography easy-to-understand, at this time, I am not going to discuss what exactly cross-polarization is, because it’s not really necessary to understand it to use this cool little device. Perhaps at a later date.
The polar_eyes is incredibly easy to install, but it’s a little tricky to keep in place for Canon flashes due to the flash design (not the filter design). Attached by a set of stick-on magnets, it is easily set up on your flash in about 2 minutes (if you’re really slow at reading the directions). Press the sticky side of the magnets to a clean flash surface, and you’re good to go! The filter is removed by gently sliding the filter up for down – you don’t want to pull it off, as the magnets can pull off, too. Don’t ask me how I know, ok? 😉
Where to Buy the polar_eyes?
Dr. Bazos has made the polar_eyes exclusively available through www.Photomed.net in the USA. Outside the USA, you will need to contact Dr. Bazos directly.
Cost: This is the absolute best part – it’s only $499! Extra sets of magnets (highly recommended by me to be on the safe side) will be a bit more, but as of the time I purchased mine, the price for them had not yet been determined. But compared to almost any other system currently available, this is super-affordable and amazingly easy to use. Literally, the first time you take a photo with it and look, you will love it.
More details and tutorials will be upcoming, so be on the lookout.
Canon Announces 2 New DSLR Cameras
While there are numerous digital SLR manufacturers, in dentistry (as in the rest of the digital camera market) there are really only 2 players: Canon & Nikon. The simple reason? There are more dentists shooting with these 2 brands than any other, because they have a long history of excellent products, from camera bodies to lenses and flashes. Each has been working to one-up the other steadily over the last few years, with the result being ever-more-affordable pro-sumer DSLR cameras, with greater ease-of-use, and far more features than we really could have imagined only a few years ago. And now Canon has announced the next in its series of EOS DSLR cameras, both of which would be excellent for dentists.
I had been planning on purchasing a Canon T2i in a month or so, but I’ve decided to hold off on replacing my Canon XTi’s at the office for just a little bit longer. 😀 This way, I’ll get to have one just in time for the Townie Meeting. Anyone interested in buying a couple Canon XTi cameras for an extremely reasonable price around early March — contact me then.
A Ring Flash Technique for Tooth Shade Matching
In response to a question on DentalTown regarding how to get rid of the excessive flash on the central incisors when taking a shade for lab restorations, my colleague Dr. David Cook responded with this trick to solve the problem. The description and photos are both courtesy of him.
One solution when you get too much perpendicular flash returning directly towards your lens is to alter the angle of your lens to the flat facial surfaces as others have advised.
Another solution is to still shoot perpendicular to the flat facial surfaces, but remove the ring flash from the front of your lens, hold it on top of your lens and angle it down 30-45 degrees. The flash is the same distance from the teeth, but the light angling down will not give you as much reflective washed out areas.
This image, the lens is perpendicular to the flat facial surface and the attached flash is perpendicular. Note the large reflected washed out facial areas on the centrals.
This image, the lens is still perpendicular, but I removed the ring flash, held it above the lens and angled it down 30-45 degrees. There are still highlights, but not the large washed out areas. You can also see the incisal translucency better and characterizations when the flash is taken off and angled down.
As others pointed out, another option is to use a twin-lite flash, such as the Canon MT-24EX TTL Macro Twin Lite or the Nikon R1C1 Wireless Closeup Speedlight system. These are generally more difficult to use for anything except the anterior teeth unless you are very experienced.
Important adapter for new Canon 100mm Macro
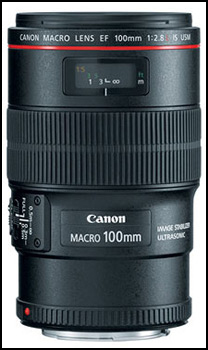
I confess, I did not bother learning much about the new Canon 100mm f/2.8L IS macro lens that was introduced early in 2010 due to the significantly greater cost and the minimal increase in usefulness for dental macro photography.
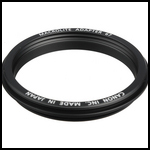
Recently, however, I learned from Mike McKenna at Photomed.net, that the new 100mm macro does NOT have the little “lip” at the end to allow the Canon MR14-EX ring flash or the Canon MT-24EX Twin Lite flash to be added. Why? I have no idea, as such flashes are an integral part of many macro photographer’s gear. In fact, I think it’s pretty stupid, but hey, I guess it’s just another way for Canon to squeeze a few more dollars out of you, because now you have to buy the Macrolite 67 adapter (see below) for another $32 or so if you do choose to buy the new version of the 100mm macro.
New Canon 100mm f/2.8L macro lens
Canon recently announced upgrades to a number of their top lenses, and for pro photographers these should generally be welcome. For dentists, however, there is one change that is not quite so good for one reason: the primary lens recommended for dentists and their teams, the Canon 100mm f/2.8 macro lens, has been updated to be an “L” glass (pros typically call their high-quality lenses “glass,” not “lens;” just a little FYI). What does this mean?
For practical purposes in dentistry, there is only 1 downside to this update, and that is that the new lens is more expensive than the previous lens by about $400, but without any real benefit. Sure, the image quality will be even higher, the lens will focus a bit faster, but the previous lens was completely adequate for everything we needed to do.
Click here to see the new lens.
Now, if you are a serious photographer outside the dental office, this lens does offer (to my mind) 1 truly significant improvement over the previous incarnation: it is waterproof or very water-resistant when combined with a Canon 7D, 5D Mark II, or any of the 1D series cameras. It is not water-resistant with any of the EOS Rebel series.
Due to this update, I am re-considering my usual recommendation to purchase the Canon 100mm f/2.8 macro for dental offices, and for cost reasons, many of you may want to look at the Sigma 105mm f/2.8 macro instead. If you can get your hands on one of the older versions (still available at some stores) or get a used one, then definitely go for it.