As 2012 is wrapping up, I thought I’d share one particular graphic from my annual WordPress.com report received today, as it is just pretty darn amazing to me and really illustrates the power we have to reach the world through the Web. The graphic sums it all up – 147 countries!
Dental Photography Accessories
Shade Matching Made Easy
Do you struggle with taking accurate shades for challenging anterior cosmetic dentistry cases, such as large composite resins or porcelain crowns? Like most of you, I’ve always considered this one of the hardest aspects of dentistry, even with the power of digital photography. Now, however, a new tool has arrived that promises to revolutionize and simplify this challenge. It’s easy to use, affordable, and the most powerful tool for analyzing and communicating hue, value, and chroma in our dental restorations that I have ever used.
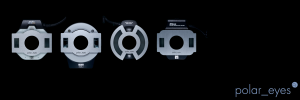
The polar_eyes Cross-Polarizing Filter
I first learned about this revolutionary new filter design on Facebook from Dr. Jason Smithson, whose composite resin artistry easily rivals that of the best lab technicians. Designed by Dr. Panaghiotis Bazos, a Greek dentist trained at the University of Southern California (Class of 2000), this filter is easily attached to Canon, Nikon, Sigma, and Metz ring flashes.
Color is Complicated
Just recently, Dr. Lane Ochi posted an Online CE Course on DentalTown.com that uses Color Theory to teach how we perceive color, and while I had learned some of this earlier, he gives the most thorough description I’ve seen – highly recommended. Fair warning – you’ll probably want to review it several times to really absorb the material, because he packs a LOT into that 1-hour course.
In simple terms, however, one of the biggest challenges we face when taking shades for cosmetic dentistry, whether porcelain or composite, is the reflection of light from the teeth, whether that reflection comes from overhead lights, ceiling lights, or the camera flash. The human eye has difficulty dealing with how that reflection can hide details of color. And given that most of us aren’t trained in truly understanding color, even if we can see it, how do we communicate it to the lab? For years, dentists have used different kinds of shade-matching devices, but based on many reviews, none of them have been particularly easy to use, and most of them are expensive.
Eliminate the Glare, and What’s Left is Color and Brightness
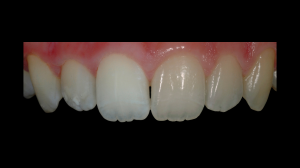
Take a look at this example photo (courtesy of Dr. Bazos), and what do you see? On the right side of the photo is what we typically see in DSLR photos taken with a ring flash, and on the left side is how teeth look when photographed using the same exact settings and the polar_eyes cross-polarizing filter. The difference is striking and easy to understand.
Since this blog is dedicated to making dental photography easy-to-understand, at this time, I am not going to discuss what exactly cross-polarization is, because it’s not really necessary to understand it to use this cool little device. Perhaps at a later date.
The polar_eyes is incredibly easy to install, but it’s a little tricky to keep in place for Canon flashes due to the flash design (not the filter design). Attached by a set of stick-on magnets, it is easily set up on your flash in about 2 minutes (if you’re really slow at reading the directions). Press the sticky side of the magnets to a clean flash surface, and you’re good to go! The filter is removed by gently sliding the filter up for down – you don’t want to pull it off, as the magnets can pull off, too. Don’t ask me how I know, ok? 😉
Where to Buy the polar_eyes?
Dr. Bazos has made the polar_eyes exclusively available through www.Photomed.net in the USA. Outside the USA, you will need to contact Dr. Bazos directly.
Cost: This is the absolute best part – it’s only $499! Extra sets of magnets (highly recommended by me to be on the safe side) will be a bit more, but as of the time I purchased mine, the price for them had not yet been determined. But compared to almost any other system currently available, this is super-affordable and amazingly easy to use. Literally, the first time you take a photo with it and look, you will love it.
More details and tutorials will be upcoming, so be on the lookout.
Photosmith iPad App Syncs with Lightroom
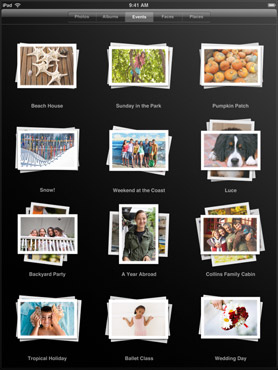
Ever since the iPad was released, many apps have been developed for photographers, but none have had much real editing functionality, nor the ability to easily work with desktop photography software. The Photosmith app is finally a real sign of change, and for dentists, this will be terrific. With the Camera Connection Kit, here’s all you have to do:
- Take the pictures with your DSLR;
- Plug the camera into the iPad with the Camera Connection Kit
- Open the “Photos” app and import all the pictures (or just selected ones)
- Open (or switch to) the Photosmith for iPad app
- Show your patients
- Create folders, add color or star ratings, keyword tags, other info
- At the end of the day, sync all the pictures to Lightroom and it keeps all that info!
Press Release
Photosmith brings Lightroom synchronization to the iPad
Photosmith introduces sorting and tagging to photographers on the go
Atlanta, GA. April 26, 2011 – C Squared Enterprises, Inc has released Photosmith for the iPad. Photosmith brings the ability to manage photos using collections, keywords, tagging, ratings, EXIF, and IPTC metadata. Photographers no longer need to wait until they get back to their main computer or drag a laptop to sort through photos or show clients their latest results. With Photosmith, photographers can load their photos directly on the iPad, filter, sort, rate, and keyword while in the field/studio. When they get back to Adobe Lightroom on their Mac or PC they can sync all photos from the iPad to Lightroom and all of their tagging and rating will also transfer with no need to duplicate effort.
Photosmith improves the photographer’s digital workflow, especially flows with RAW images. Photosmith offers viewing of full RAW image data from the latest dSLR cameras in full fidelity and up to 100% zoom; even on 25+ megapixel images. Photosmith offers a grid view for quickly sorting through thumbnails and collections, a loupe view for viewing individual images and tagging, and a full screen view to maximize use of the screen. Users can assign a rating, choose a color label, view the basic EXIF data (shutter speed, ISO, f/stop, and more), or edit the title, caption, or a number of other IPTC fields. All these settings are synchronized with Lightroom using the free Photosmith plugin. Future changes made in Lightroom are saved back to the iPad during a sync as well. See more at: http://bit.ly/PhotosmithTour
Photosmith assists photographers on the go with sharing their photos too. Photos can be sent to Flickr, Facebook, Dropbox, or email. Those sent to Flickr and Facebook maintain their titles and keywords, allowing pros to quickly share and get feedback from their clients, or allows the causal photographer to share photos while on vacation.
Photosmith is the culmination of 24 months of effort and development continues to add new features over time. Users are encouraged to submit feedback and suggestions to help drive the future of the app.
The app is available worldwide for US$17.99 (or the approximate equivalent).
For more information please visit http://www.photosmithapp.com
DDS GP: The iPad “Killer App” for Dentists
Do you have an iPad? If not, WHY NOT!?!?!? 😀
We got our iPad right after it came out in 2010, and I must say, it has essentially replaced my laptop for any time I need a computer but am not sitting at my desk. There’s a darn good reason Oprah named it one of her Ultimate Favorite Things.
But for dentists, IMO, there is now a completely different reason for the iPad to become one of YOUR ultimate favorite things, and that is one particular app: DDS GP.
Use Your Own Photos to Educate Your Dental Patients
One of the best features of this app, is the ability to add your own patient photos to individual presentations. All you have to do is create a folder of pictures to sync to the iPad, and from within the app, select the photos to add to each presentation, with no limit. So add Before/After Portraits — composites, amalgams, CERECs, and more! Then put the iPad in your patients’ hands and simply WOW them!
%CODE1%
Customizable, Portable, & Easy-to-Learn for Dentists and Dental Teams
The DDS GP app currently has more than 200 different presentations, and more are being added regularly. They include such procedures and diagnoses as:
- Bleaching: In Office
- Bone Graft with Extraction
- Bridge: Porcelain, Anterior
- Crown-Lengthening
- Brushing: Bass Technique
- Cracked Tooth, Cusp
- Crown: CEREC
- Invisalign
- Nightguard: NTI
- Veneer, Single: Porcelain, Lab
Affordable Dental Case Presentation Software vs. CASEY or GURU
Unlike Patterson Dental’s CASEY (which can run up to $8000) or Henry-Schein’s GURU (not sure, but I have heard about $2000?), DDS GP is truly affordable — only $399! No, I am not kidding, AND that includes free lifetime updates! No, I am not kidding about that, either.
Email Treatment Plans, Add Fees, Include the Presentations, & More
From directly within the app, you can create treatment plans and add presentations from the app, then send it right to your patient via email, or if you have a compatible printer, print it directly from your iPad. This makes it easy for husbands or wives to show their spouses the same, easy-to-understand presentations that helped them make the decision to move forward on treatment.
Wacom Tablets Make Photo Editing Easy
Have you ever tried hand-writing anything on a photo using a mouse? Or using the mouse to make a selection in Photoshop/Photoshop Elements? If so, you know just how frustrating and difficult it can be. Your wrist probably also knows how strenuous it can be. A few years ago, I was doing so much photo editing and typing, even with an ergonomic keyboard, that my wrists were starting to hurt, and at 2 points I had to wear a wrist-guard for support. Needless to say, putting on latex gloves over one of those things didn’t work too well!
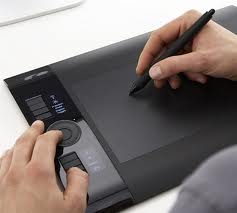
And that’s why I highly recommend you get a Wacom graphics tablet. By using a natural hand-writing motion, you can paint, select, write, draw, etc. far more accurately and comfortably.
Wacom Intuos4 Graphics Tablets are Ideal for Dentists
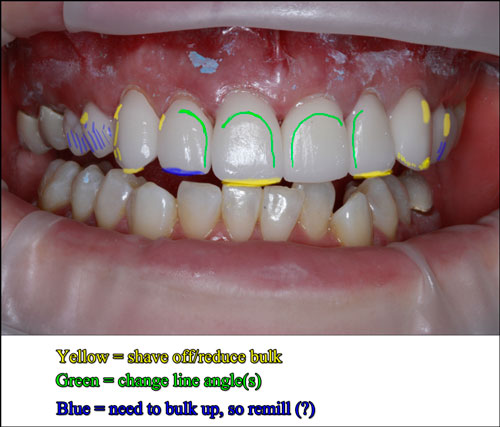
I love using my tablet particularly for cosmetic corrections on big cases, as demonstrated here. This is a CEREC smile makeover case, 10 units of Empress MultiCAD shade BL3. To be completely frank, this was my first 10-unit CEREC case, and while I felt pretty good about how it came out, it wasn’t quite good enough to bond in.
So I took some photos, put this one in Photoshop, and started drawing out the corrections I want to make. I’ll send this to the patient to see if she agrees with me, then I’ll sit down in the lab to correct as needed (will have to redesign/remill a few of them) with this in front as a guide.
Here’s another case from a few years ago – using a Wacom pen/tablet, I can mark up photos as much as I want by using separate layers. Send pictures like this to your lab in preparation for your diagnostic waxup, and it’s a lot easier for them to know what your thought process is and where you’re going with the case. (Just so you know, this was one of about 4-5 pictures sent, not the only one, in case you were worried.)
After all……..how many have ever had a lab tell them they sent “too much” info for a big case? 😆
Scratch my mirrors and die….then buy me Starbucks for a week!
How to care for dental mirrors
Ok, so I can’t take credit for the title or ANY of the following post, as it was copied verbatim from a post on a professional dental forum. Fortunately my friend doesn’t mind me copying and pasting as long as I paste his name really big right here. LOL
========================================================================
OK-in the never ending battle, we bought some new mirrors this week and have come up with the following office policy:
The first person to scratch the new mirrors:
1-dies
2-buys the office Starbucks for a week…
I take alot of pics in the office and scratches drive me crazy-especially when they are projected or published…so I came up with this idea:
Step 1: Buy new mirrors AND a box of microfiber photo cloths…I bought the cloths from Uline.com for about 35 bucks…
Unfold said cloths and tuck in mirros…
Fold the top to the bottom then the sides over the sides…
Bag ’em and run ’em through the sterilizer…
Mirrors stay safe, clean, sterilized, always have a cloth..keep em clean, keep the drops off in the autoclave…open the bag and the mirros stay on the cloth at all times. The cloths can be washed as well.